


· Micha
Outdoor Water Filtration Guide: How to Find and Safely Drink Water While Hiking & Backpacking
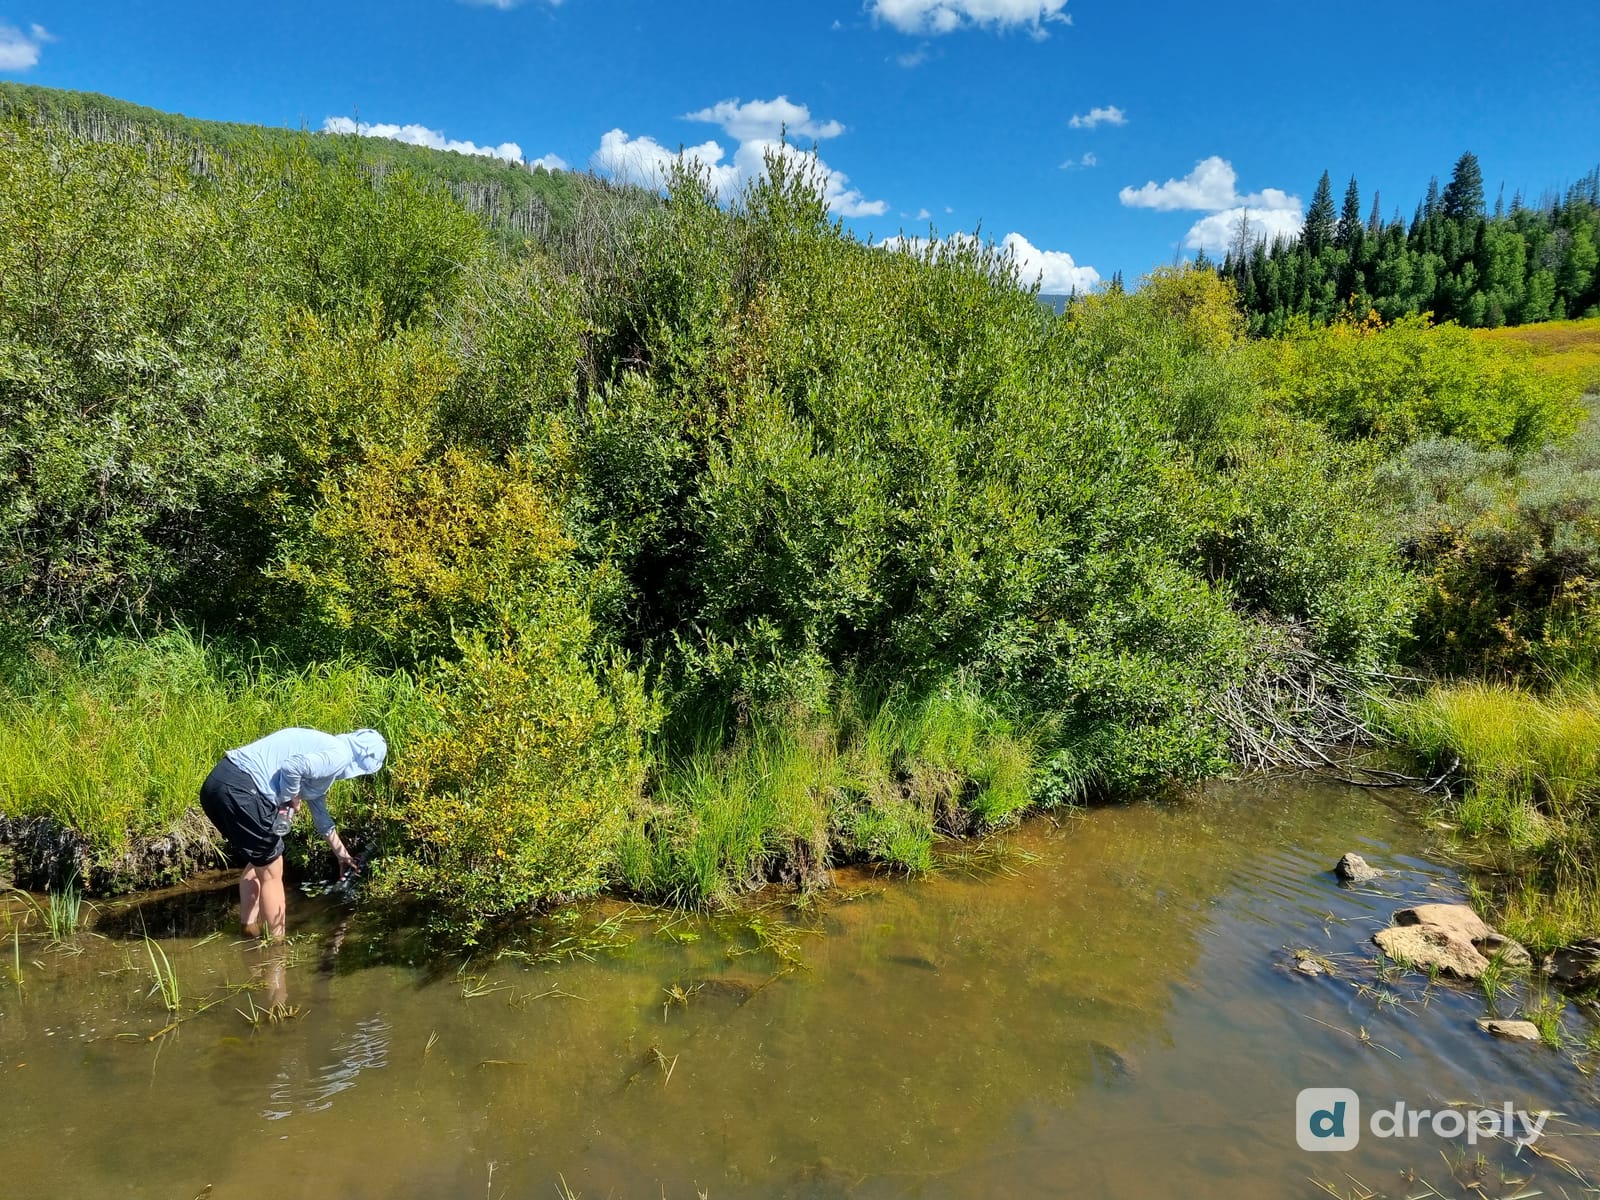
How to find water on the trail, know when it needs treating, and choose between squeeze filters, gravity systems, and chemical backups. Lessons from five months on the Continental Divide Trail.
A reliable water filter and the knowledge to use it correctly are what let you carry two liters instead of six. After several thousand kilometers of trail, including five months on the Continental Divide Trail, I’ve come to believe water management matters more than any single piece of gear in your pack, lighter backpack included.
We started the CDT at the Mexican border in New Mexico’s desert carrying six liters (200 oz) each, terrified of the trail’s dry reputation. Two miles in, we dumped half of it. Our shoulders couldn’t take the weight, and it was obvious we’d overpacked our fear rather than the trail’s actual demands. That single mistake taught me more about water than any gear list: the goal isn’t to carry enough water to survive the worst case. It’s to know where the next source is so you don’t have to.
That’s the real subject of this guide: how to find water using an app like droply, which maps springs, fountains, and streams so you always know what’s ahead. And how to treat what you find so it’s actually safe to drink: filters, chemical backups, and a bit of field judgment.
The biggest hiking mistake: carrying too much water
The single biggest water mistake hikers make is carrying far more than they need, out of fear rather than information.
Most beginners load up with 4 to 6 liters “just in case.” They pay for it in blisters, slow pace, and sore shoulders for miles they didn’t need to carry that weight. Experienced hikers do the opposite: they know where the next reliable source is, they refill often, and they carry only what gets them there comfortably. The difference isn’t toughness, it’s information.
Find water first, filter second. This is the mental shift that changes everything about how much weight you carry. droply helps with the “find” half. Hikers and other users pin springs, mountain huts, drinking fountains, streams, and other natural sources on a map, tag what kind of source it is, and leave recent notes on whether it’s actually flowing. That last part matters more than people expect. A spring marked on a five-year-old map tells you almost nothing about whether it’s running today.
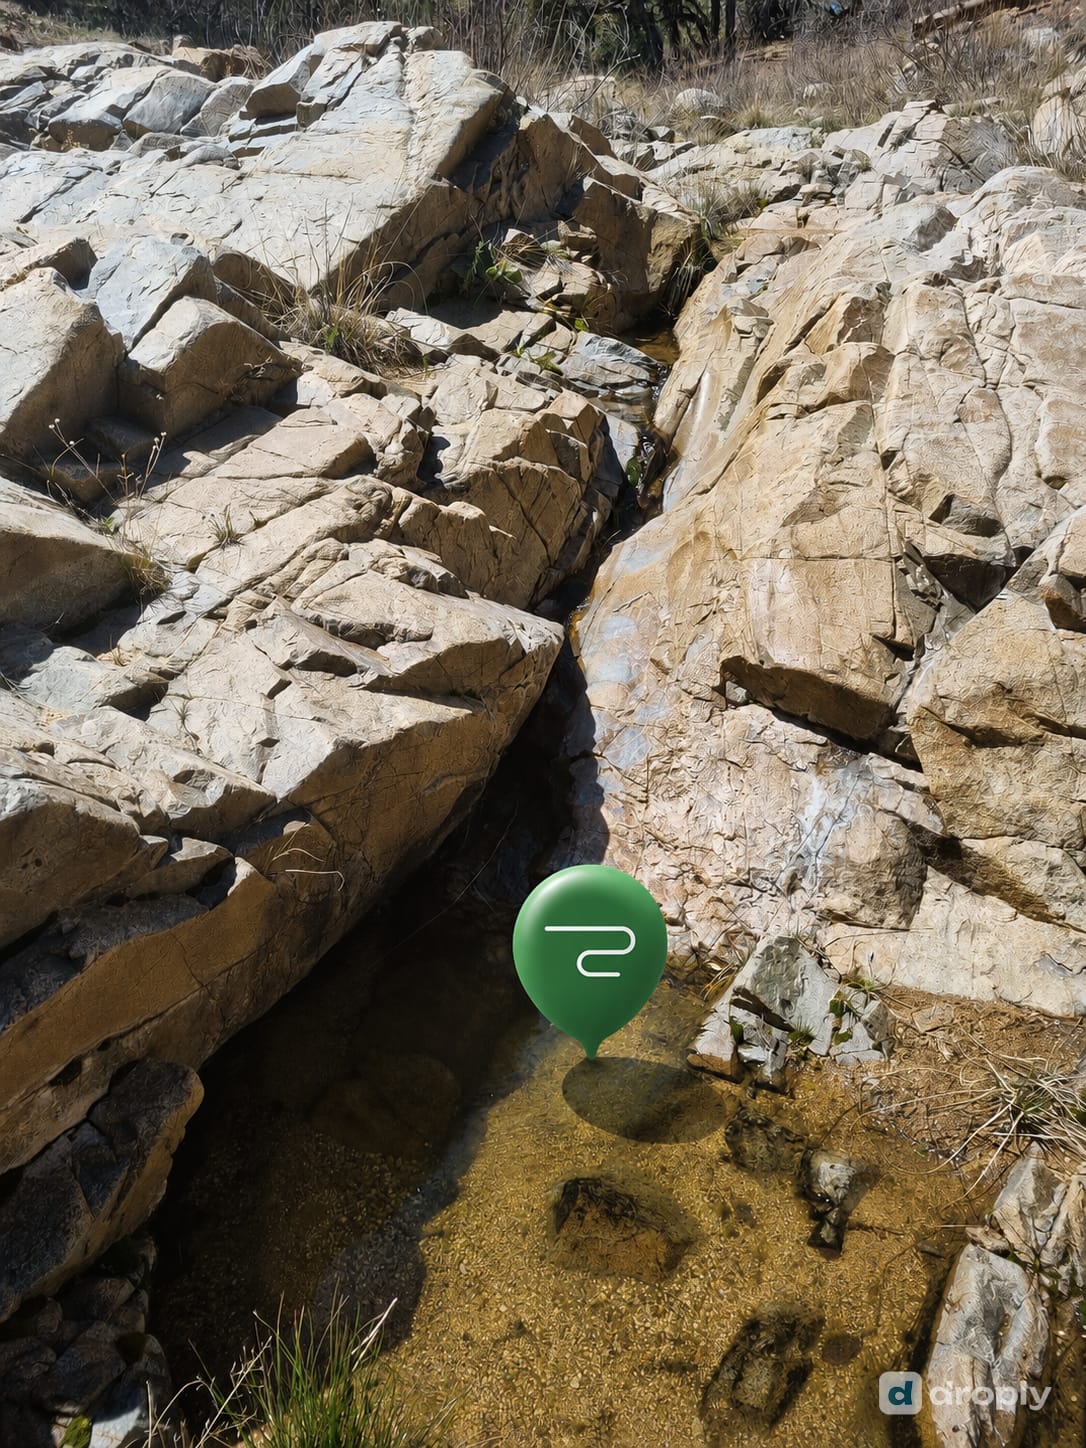
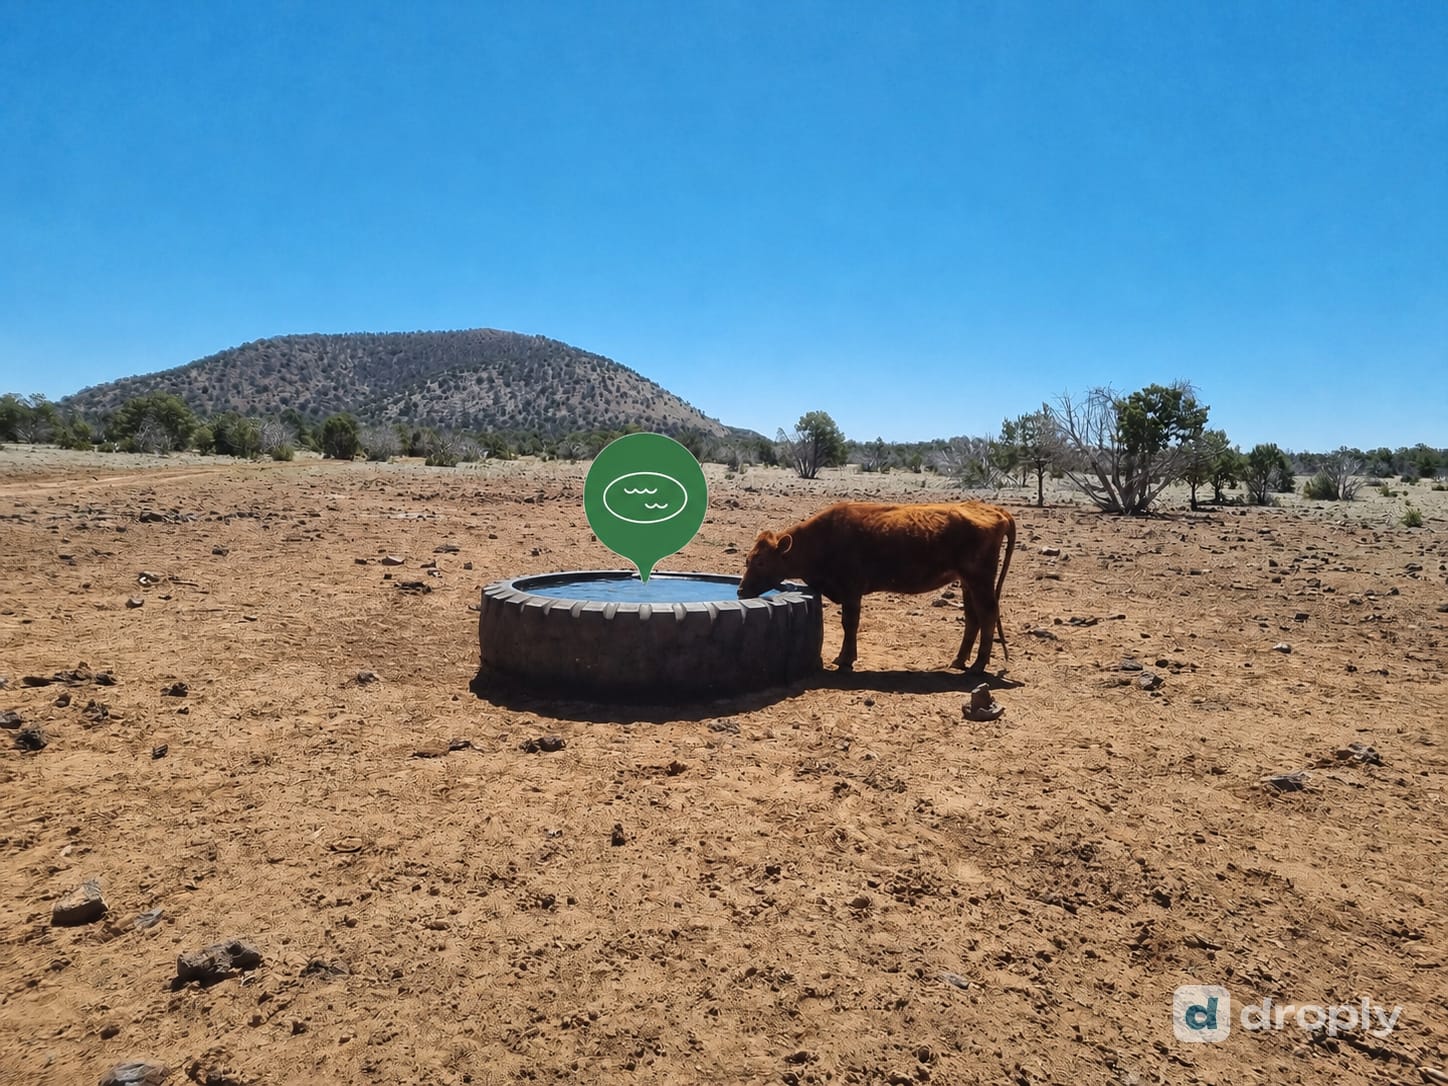
Once you’ve found water, though, you’re only halfway done. Finding a source doesn’t mean it’s safe to drink. That’s a separate question, and it’s the one that trips up a lot of first-time backpackers.
Do you actually need to treat mountain water?
Yes, you should treat essentially all backcountry water in Europe and North America. Clear water is not the same thing as safe water.
Risk in any given source depends on what’s upstream: wildlife, grazing livestock, other hikers camping nearby, or human settlement further up the watershed. A source can look completely pristine, cold, clear, fast-moving, and still carry pathogens picked up from a deer carcass, a cattle pasture, or a poorly buried cathole a mile upstream.
The CDC’s backcountry water treatment guidance names four organisms as the main concern in US and Canadian wilderness water:
- Giardia: a protozoan parasite, the classic “backpacker’s diarrhea” cause.
- Cryptosporidium: a hardier protozoan that survives some chemical treatments far better than Giardia does.
- E. coli: bacteria typically from fecal contamination, human or animal.
- Campylobacter: bacteria commonly linked to wildlife and livestock.
Here’s the part that surprises people: most wilderness water problems come from bacteria and protozoa, not from visible dirt or sediment. A muddy cattle tank and a crystal-clear alpine stream carry the same category of risk. The mud just makes the tank less pleasant to look at and harder on your filter. Treat both.
Different ways to make water safe
There isn’t one “correct” method. Boiling, chemical treatment, UV, and filtration all work, but they trade off speed, weight, and what they actually remove. Here’s how I think about each one after using all four on trail.
Boiling
Boiling is the gold standard for backcountry disinfection. It kills virtually everything biological, with no membrane pore size to worry about and no chemistry to get wrong.
- Pros: Kills bacteria, viruses, and protozoa with no equipment beyond a pot and a heat source.
- Cons: Costs fuel, requires waiting for a rolling boil and then cooling before you can drink it. Genuinely impractical if you’re covering 20+ miles a day and refilling six times.
My take: great for car camping or a basecamp dinner. Never for thru-hiking, because the fuel weight and time cost add up fast when you’re filling bottles multiple times a day.
Chemical treatment (chlorine dioxide)
Chlorine dioxide tablets, Katadyn Micropur Forte, or Micropur drops if you prefer liquid to tablets, are the lightest, most reliable backup you can carry. It’s the one product I never hike without.
- Pros: Ultralight (a few grams for a whole resupply stretch), no moving parts to break, effective against viruses as well as bacteria and protozoa. Works as an emergency primary method if your filter fails entirely.
- Cons: Requires waiting time before you can drink. Chlorine dioxide is notably more effective against Cryptosporidium than iodine or chlorine, but that protection needs a longer contact time: commonly cited as around 30 minutes for viruses and bacteria, and up to four hours for Cryptosporidium specifically. It leaves a mild chemical taste, and does nothing for sediment or cloudiness.
My CDT story with these tablets is the reason I’ll never hike without them again. Deep into a cold stretch, my squeeze filter froze solid overnight, completely unusable, and I had no way to thaw it fast enough to matter. Micropur tablets saved that day and the next. I’d treated them as a backup I probably wouldn’t need. After that, they became a non-negotiable part of the kit. Carry a few tablets always. Not as your primary method, but as the thing that saves you when your primary method fails.
UV purification
UV purifiers (like a SteriPEN-style device) are worth a brief mention, though most thru-hikers I met on the CDT had abandoned them by the halfway point.
- Pros: Lightweight, effective against viruses as well as bacteria and protozoa.
- Cons: Needs batteries (a real liability on a multi-week resupply). Only works properly in clear water since sediment can shield pathogens from the UV light, and the units cost more than a filter.
My take: rarely used by thru-hikers for a reason. It’s a fine choice for shorter trips where battery life isn’t a resupply headache. But a filter beats it on every trail metric that matters over months of use.
Hollow-fiber membrane filters
This is the workhorse of modern backpacking, and where most of your gear decision should actually go.
Hollow-fiber filters push water through a bundle of ultra-fine, straw-like fibers, typically rated 0.1 to 0.2 microns. That pore size is small enough to physically block bacteria and protozoa, including Giardia and Cryptosporidium. But it is not small enough to stop viruses, and it does nothing for dissolved chemicals or heavy metals, a limitation MSR/Cascade Designs explains in more depth. For the wilderness of Europe, North America, and most remote backcountry, that’s exactly the coverage you need. Bacteria and protozoa, not viruses, are the dominant real-world risk there.
This is where your actual gear choice lives, and the next section breaks down the different filter formats.
Types of hiking filters
Squeeze filters: the thru-hiker default
Squeeze filters are what almost everybody on the CDT actually carried. You fill a soft flask with raw water, screw the filter on, and squeeze, hence the nickname you’ll hear at every water source on trail: “squeeze, squeeze.”
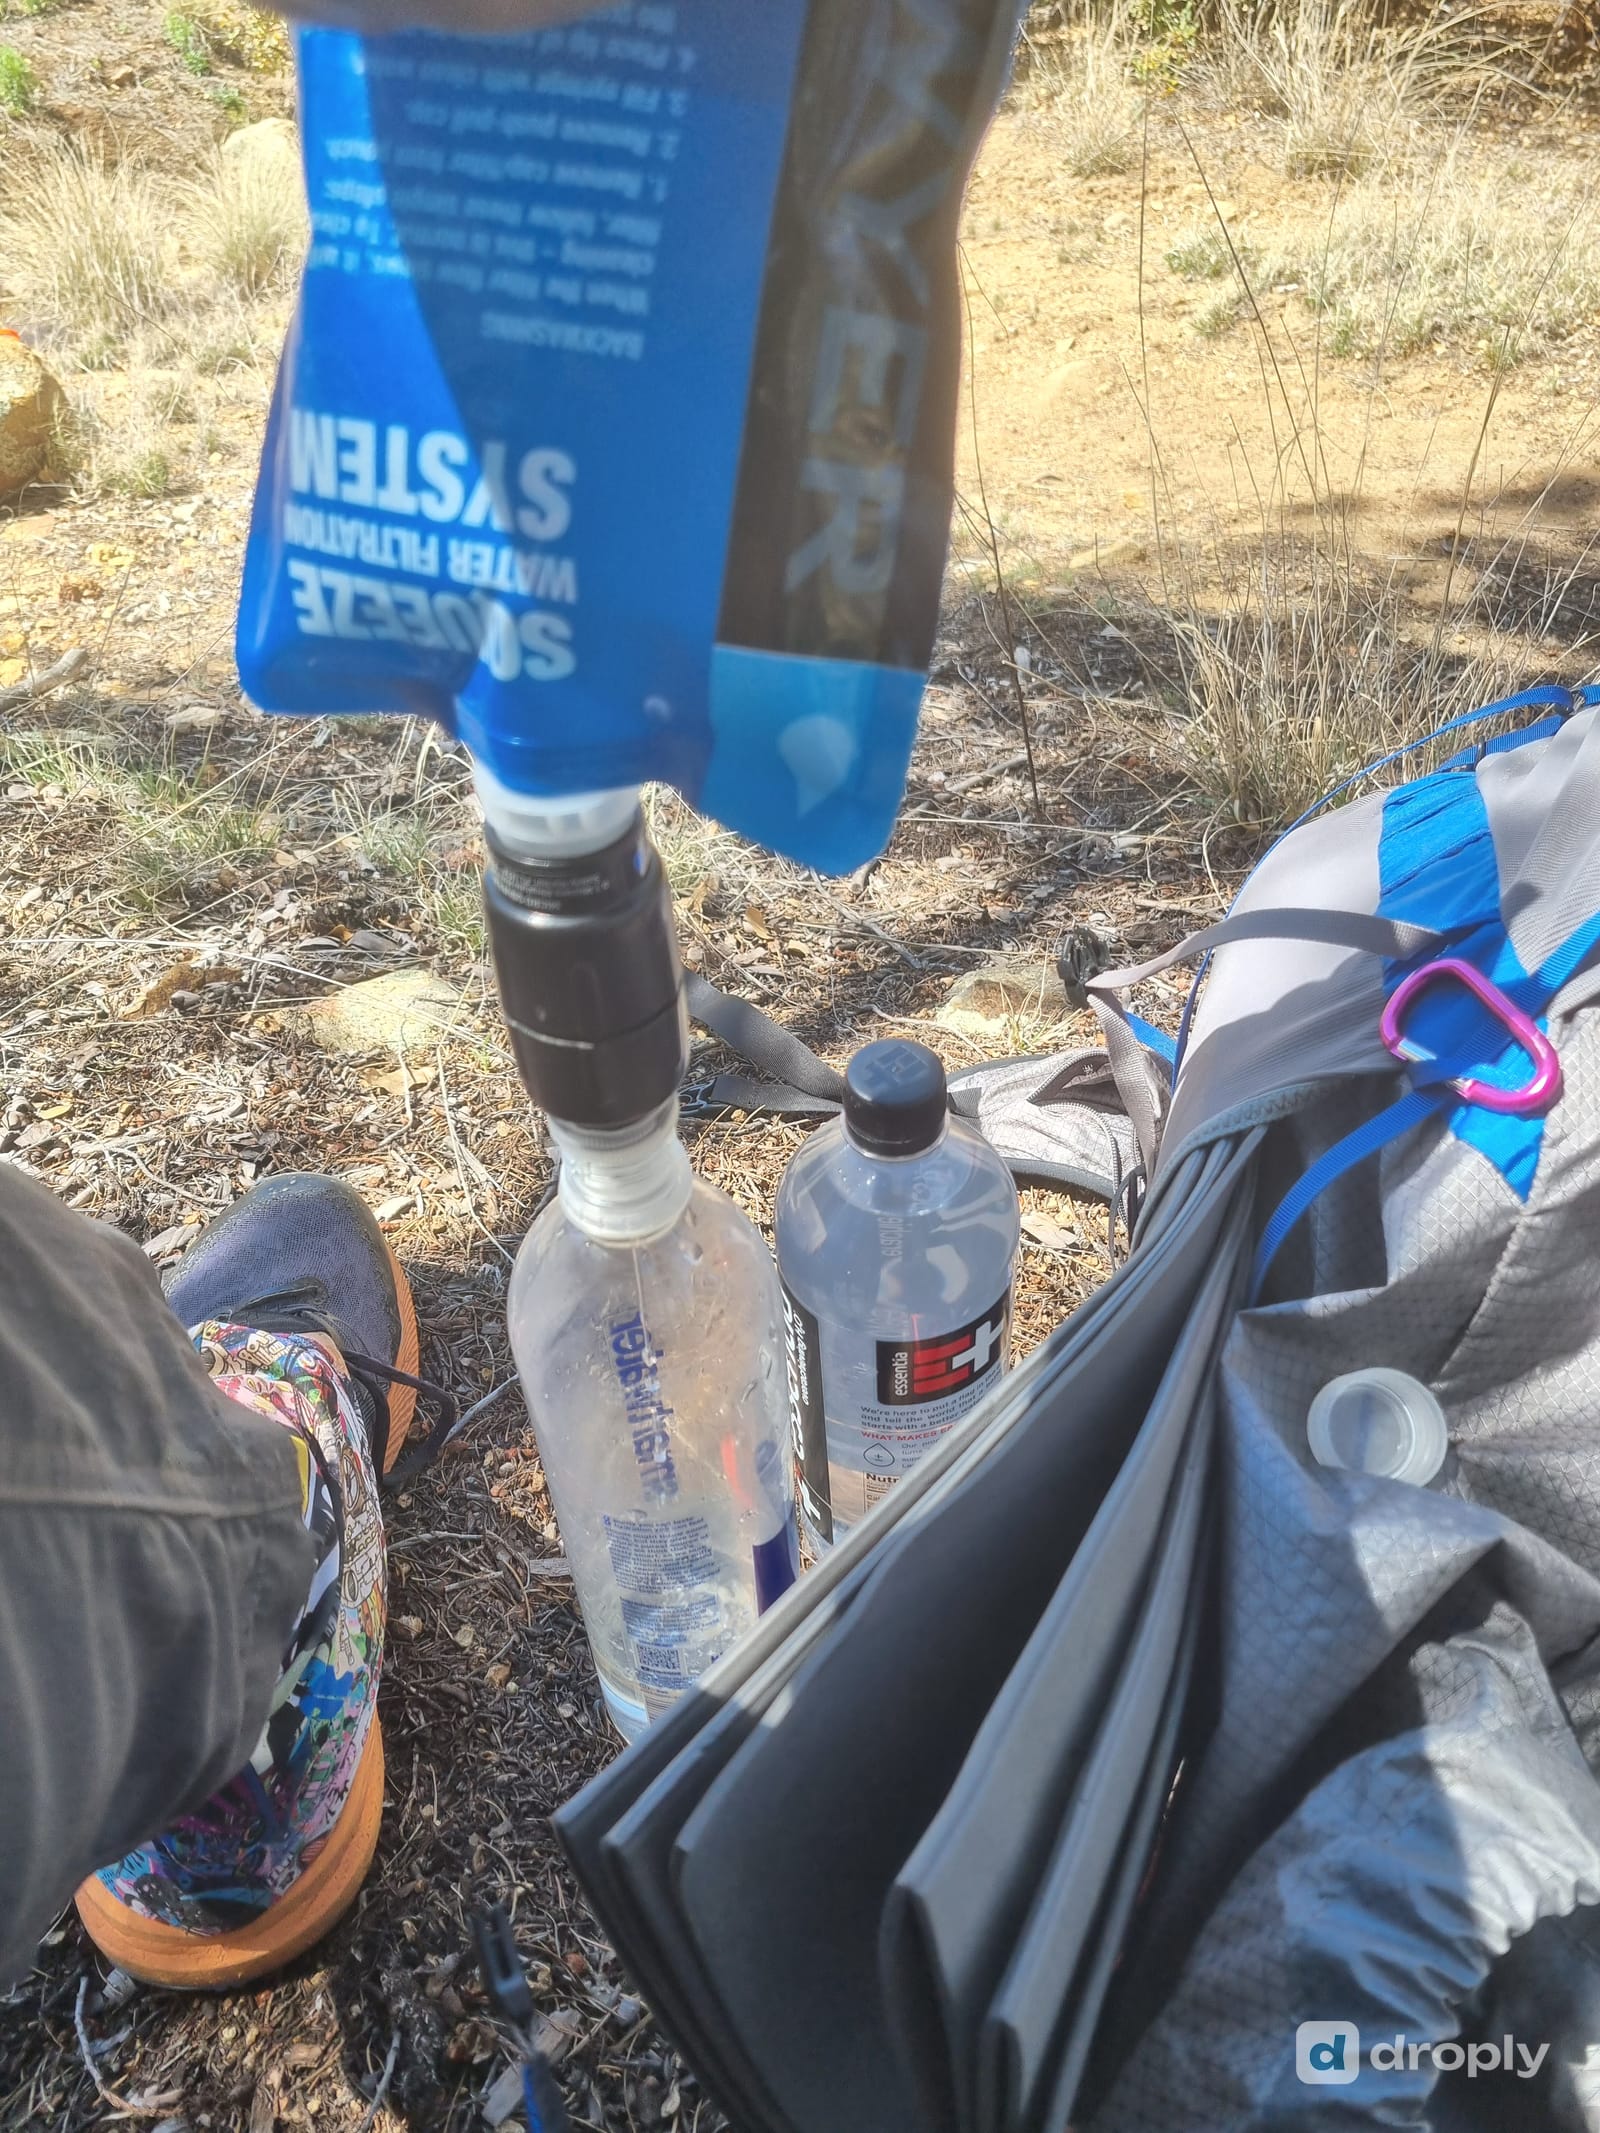
The three names that matter here are the Platypus QuickDraw, the Sawyer Squeeze, and the Katadyn BeFree. All three filter to 0.1–0.2 microns and meet the same EPA-referenced safety standard for bacteria and protozoa removal. The real differences are in flow rate, durability, and how they hold up over months of daily use:
- Platypus QuickDraw: the fastest flow of the three (rated around 3 L/min new), with the most durable soft-flask material and an easy backflush that keeps flow rate high for longer. This is what I switched to and never looked back.
- Sawyer Squeeze: the cheapest and most field-serviceable of the three, with a huge installed base and a filter that can outlast the trip if you backflush it. This is the exact filter in the trail photo below. Its included pouches are thin and prone to leaking at the seams over heavy use.
- Katadyn BeFree: the lightest of the three and very fast when new. It can’t be backflushed the way the other two can, and its flow rate drops off faster over a long trail.
Pros across the category: fastest treatment method on trail, genuinely ultralight, easy to maintain with a squeeze filter. This is the format I recommend to almost anyone hiking multi-day trips.
Gravity filters
Gravity filters use the same hollow-fiber membrane but let gravity do the squeezing. You hang a bag of raw water and let it drain through the filter into a clean reservoir.
- Pros: Perfect for camp: set up your tent, start cooking, and let the filter do its thing while you get other things done. Great for filtering for a group at once.
- Cons: Not practical during quick hiking stops, since you need somewhere to hang the bag and a few minutes of downtime.
This matches my own experience closely: gravity systems shine at camp and are dead weight on a fast resupply-to-resupply push.
Pump filters
Pump filters push water through a cartridge by hand, often with a pre-filter that handles heavily silted water better than a squeeze filter can. The Katadyn Pocket is the name that defines this category. It’s a ceramic-cartridge pump built around a 20-year guarantee, field-cleanable rather than disposable, and the filter you’ll still see in the hands of expedition teams and aid organizations decades after it was bought.
- Pros: Reliable, and genuinely good at handling muddy or silty water without clogging as fast. A ceramic pump like the Katadyn Pocket can be scrubbed clean in the field instead of replaced, which matters for very long expeditions or base-camp use.
- Cons: Heavy, bulky, and slower per liter than a squeeze filter. Mostly outdated for thru-hiking now that squeeze filters exist, though some backcountry guides, hunters, and expedition teams still prefer them for their durability.
Filter bottles
Filter bottles build the filter into the cap or the bottle wall itself, so you fill and drink straight away. Selfpress is a simple press-to-filter bottle. You fill it, press the plunger, and 500 ml is filtered in seconds, no squeezing or sucking required, well suited to day hikes. Water to Go takes it further. Its replaceable cartridge combines mechanical filtration with an electrostatic charge and activated carbon. That’s what lets it claim virus removal (down to around 0.03 microns) as well as bacteria, protozoa, and even some heavy metals and chemicals, genuinely purifier-grade, not just a filter. Other common names in this category include LifeStraw Go, Grayl, and the Katadyn BeFree bottle.
- Pros: Fill, drink immediately, nothing else to carry. Excellent for day hiking where you’re not managing a multi-liter resupply.
- Cons: Harder to use for cooking, harder to fill a hydration bladder through, and awkward to share water with hiking partners since everyone needs their own bottle. Systems like Water to Go that add virus filtration are dual-use purifier/filter systems, so check which category yours falls into if virus protection matters to your trip.
Straw filters
The LifeStraw Personal and similar straw filters let you drink directly from a source, no bottle required.
My take: emergency-kit-only. Not enjoyable to use for real hydration needs, since you can’t carry filtered water forward, only drink in the moment. Not practical as a primary system on any multi-day trip either. Good backup to have buried in your pack, poor choice as your main method.
How to choose the right filter
The right filter depends entirely on the trip, not on which one is “best” in the abstract:
- Day hikes → a filter bottle like Selfpress. Fill and go, nothing extra to carry.
- Long-distance hiking → a squeeze filter. Fast, light, and field-maintainable over months.
- Camping or group trips → a gravity filter. Set it up, walk away, come back to full reservoirs.
- Emergency kit → a LifeStraw or a strip of Micropur tablets. Small, shelf-stable, no maintenance.
- International travel → think purifier, not filter, once virus protection is a real concern. A bottle like Water to Go covers that in one step.
My personal pick, after switching partway through the CDT, is the Platypus QuickDraw. The flow rate alone is worth the switch. It stays noticeably faster than the Sawyer Squeeze over weeks of daily silty water. The backflush is genuinely easy in the field, no extra syringe needed the way some setups require, and it threads directly onto standard PET bottles, so you’re not locked into a proprietary soft flask if it fails. It’s the filter I recommend to most hikers who ask me what to buy before a long trail.
How to take care of your filter
A hollow-fiber filter is durable, but it has a few rules that aren’t optional if you want it to last a whole trail.
Never let it freeze. This is the single most common way thru-hikers destroy a filter, and it happened to me on a cold CDT night. Sleep with your filter inside your jacket or sleeping bag on any night that might drop near or below freezing. Treat it like you would a phone battery in the cold.
Backflush regularly. Flow rate decreases naturally as the fibers trap more sediment. Backflushing, pushing clean water back through in reverse, is the single best thing you can do to keep a filter usable for months instead of weeks.
Store it clean and dry. Before any long-term storage, disinfect the filter per the manufacturer’s instructions and let it dry as recommended, rather than sealing it away wet. A damp filter left in a stuff sack is a good environment for biofilm and mold to build up inside the fibers.
What actually happens after freezing
I want to be specific about this because it’s more dangerous than it sounds. On the CDT, my filter froze and the flow slowed dramatically afterward, an obvious, visible sign something was wrong. But the damage isn’t always that obvious. Many hollow-fiber filters can appear to work completely normally after freezing, even though the microscopic fibers have cracked internally, letting water bypass the filtration pores it’s supposed to pass through. Flow rate is not a reliable check for freeze damage.
If a filter freezes after use, replace it. Don’t test your luck on a filter you can’t verify is intact. A $40–50 replacement is cheap insurance against Giardia three days from the nearest town.
What filters can, and can’t, do
Understanding a filter’s actual limits is what keeps you safe when the water source itself, not the filter, is the problem.
Filters remove:
- Bacteria (including E. coli, Campylobacter)
- Protozoa (Giardia, Cryptosporidium)
- Sediment and visible particulates
Standard filters usually do NOT remove:
- Viruses (some premium filters and dedicated purifiers do, see below)
- Heavy metals
- Pesticides and industrial pollution
- Fuel or petroleum contamination
- Dissolved chemicals generally
- Cyanotoxins from harmful algal blooms. This one surprises a lot of people, since the toxins are dissolved in the water itself and pass straight through a hollow-fiber membrane along with the “clean” water.
Filter vs. purifier, briefly: most backpacking products on the market, the Sawyer Squeeze, Platypus QuickDraw, Katadyn BeFree, are filters. They physically block bacteria and protozoa but let viruses through. A purifier adds virus protection, either through a tighter membrane, an electrostatic charge (this is how bottle-integrated purifiers like Water to Go work), a UV step, or a chemical treatment layer, which is why chlorine dioxide tablets count as a purification method on their own. If you’re traveling somewhere with unclear sanitation, or drinking water downstream of a town, reach for a purifier or add a chemical step. A standard filter alone isn’t enough there.
Avoid drawing water near farms, old mines, or any industrial activity. None of the treatment methods in this guide remove what those sources can add to the water. And be deliberate about human contamination generally. Remote wilderness water is usually your safest bet, while sources downstream of villages, popular campsites, or cities carry meaningfully higher virus risk, exactly the situation where a chemical treatment step or a purifier earns its weight.
Algae is its own category of danger. Blue-green algae (cyanobacteria) blooms release toxins that survive filtration completely. No hollow-fiber filter, and no amount of boiling, removes them. If there’s a visible bloom or an official advisory posted for a lake or reservoir, don’t drink it and don’t filter it. Find another source, full stop.
Choosing the best water source
Given a choice, not every water source is equal. Here’s roughly how I’d rank them, from a 2024 CDT thru-hike’s worth of trial and error:
- Cold spring: the gold standard. Cold, usually low in organic contamination, often emerging from underground where fewer pathogens survive.
- Fast-flowing stream: moving water dilutes and doesn’t pool contamination the way standing water does.
- Mountain creek: generally reliable, though check what’s upstream before committing.
- Lake: fine in most cases, but more prone to algae and warmer temperatures than moving water.
- Cattle/stock pond: drinkable once treated, but expect sediment, algae, and a much faster-clogging filter.
- Standing puddle: last resort only, and treat it as the highest-risk source on this list.
A few field rules that consistently mattered on trail:
- Flowing water beats stagnant water. Within a creek, collect where the current is running fastest, not from a slack backwater. Cold beats warm too, both correlate with lower pathogen load.
- Collect upstream of any animal crossing, trail, or campsite. Specifically avoid drawing water immediately below a campsite, where graywater and human waste are most likely to have entered the system.
- If you’re forced to use a pond or tank, collect from below the surface rather than skimming algae or floating debris off the top. The water a few inches down is meaningfully cleaner than what’s sitting right at the surface. If it’s silty, pre-filter through a bandana first to save your actual filter’s lifespan.
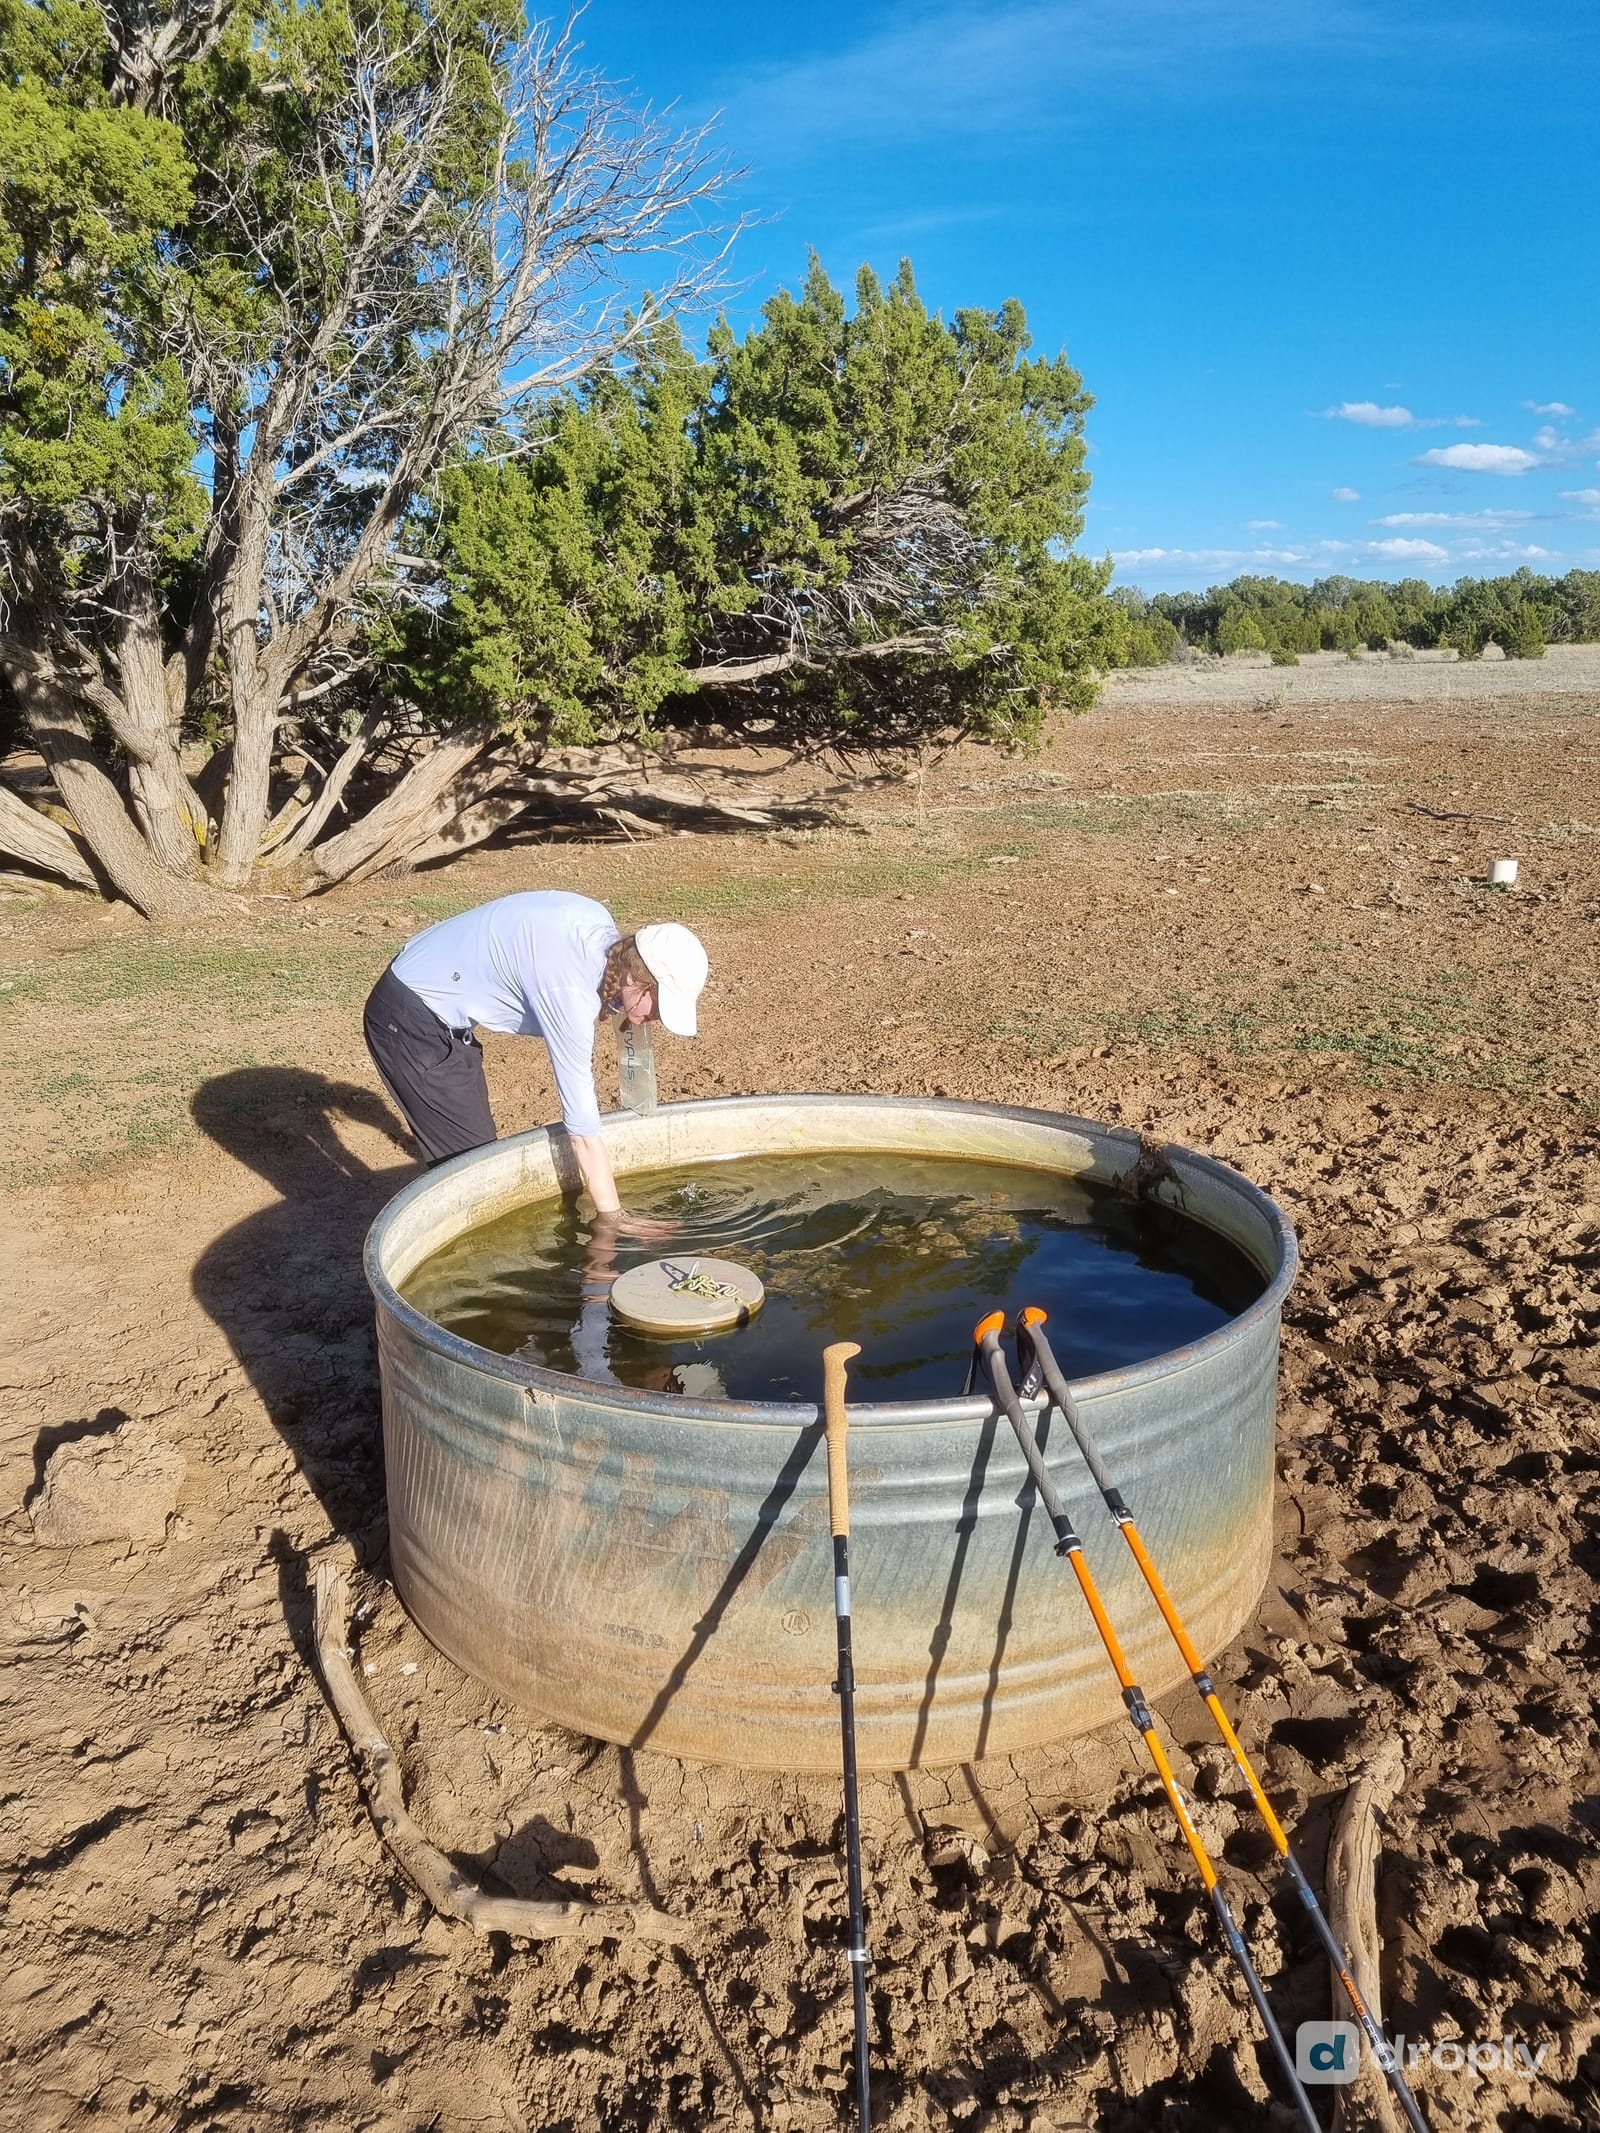
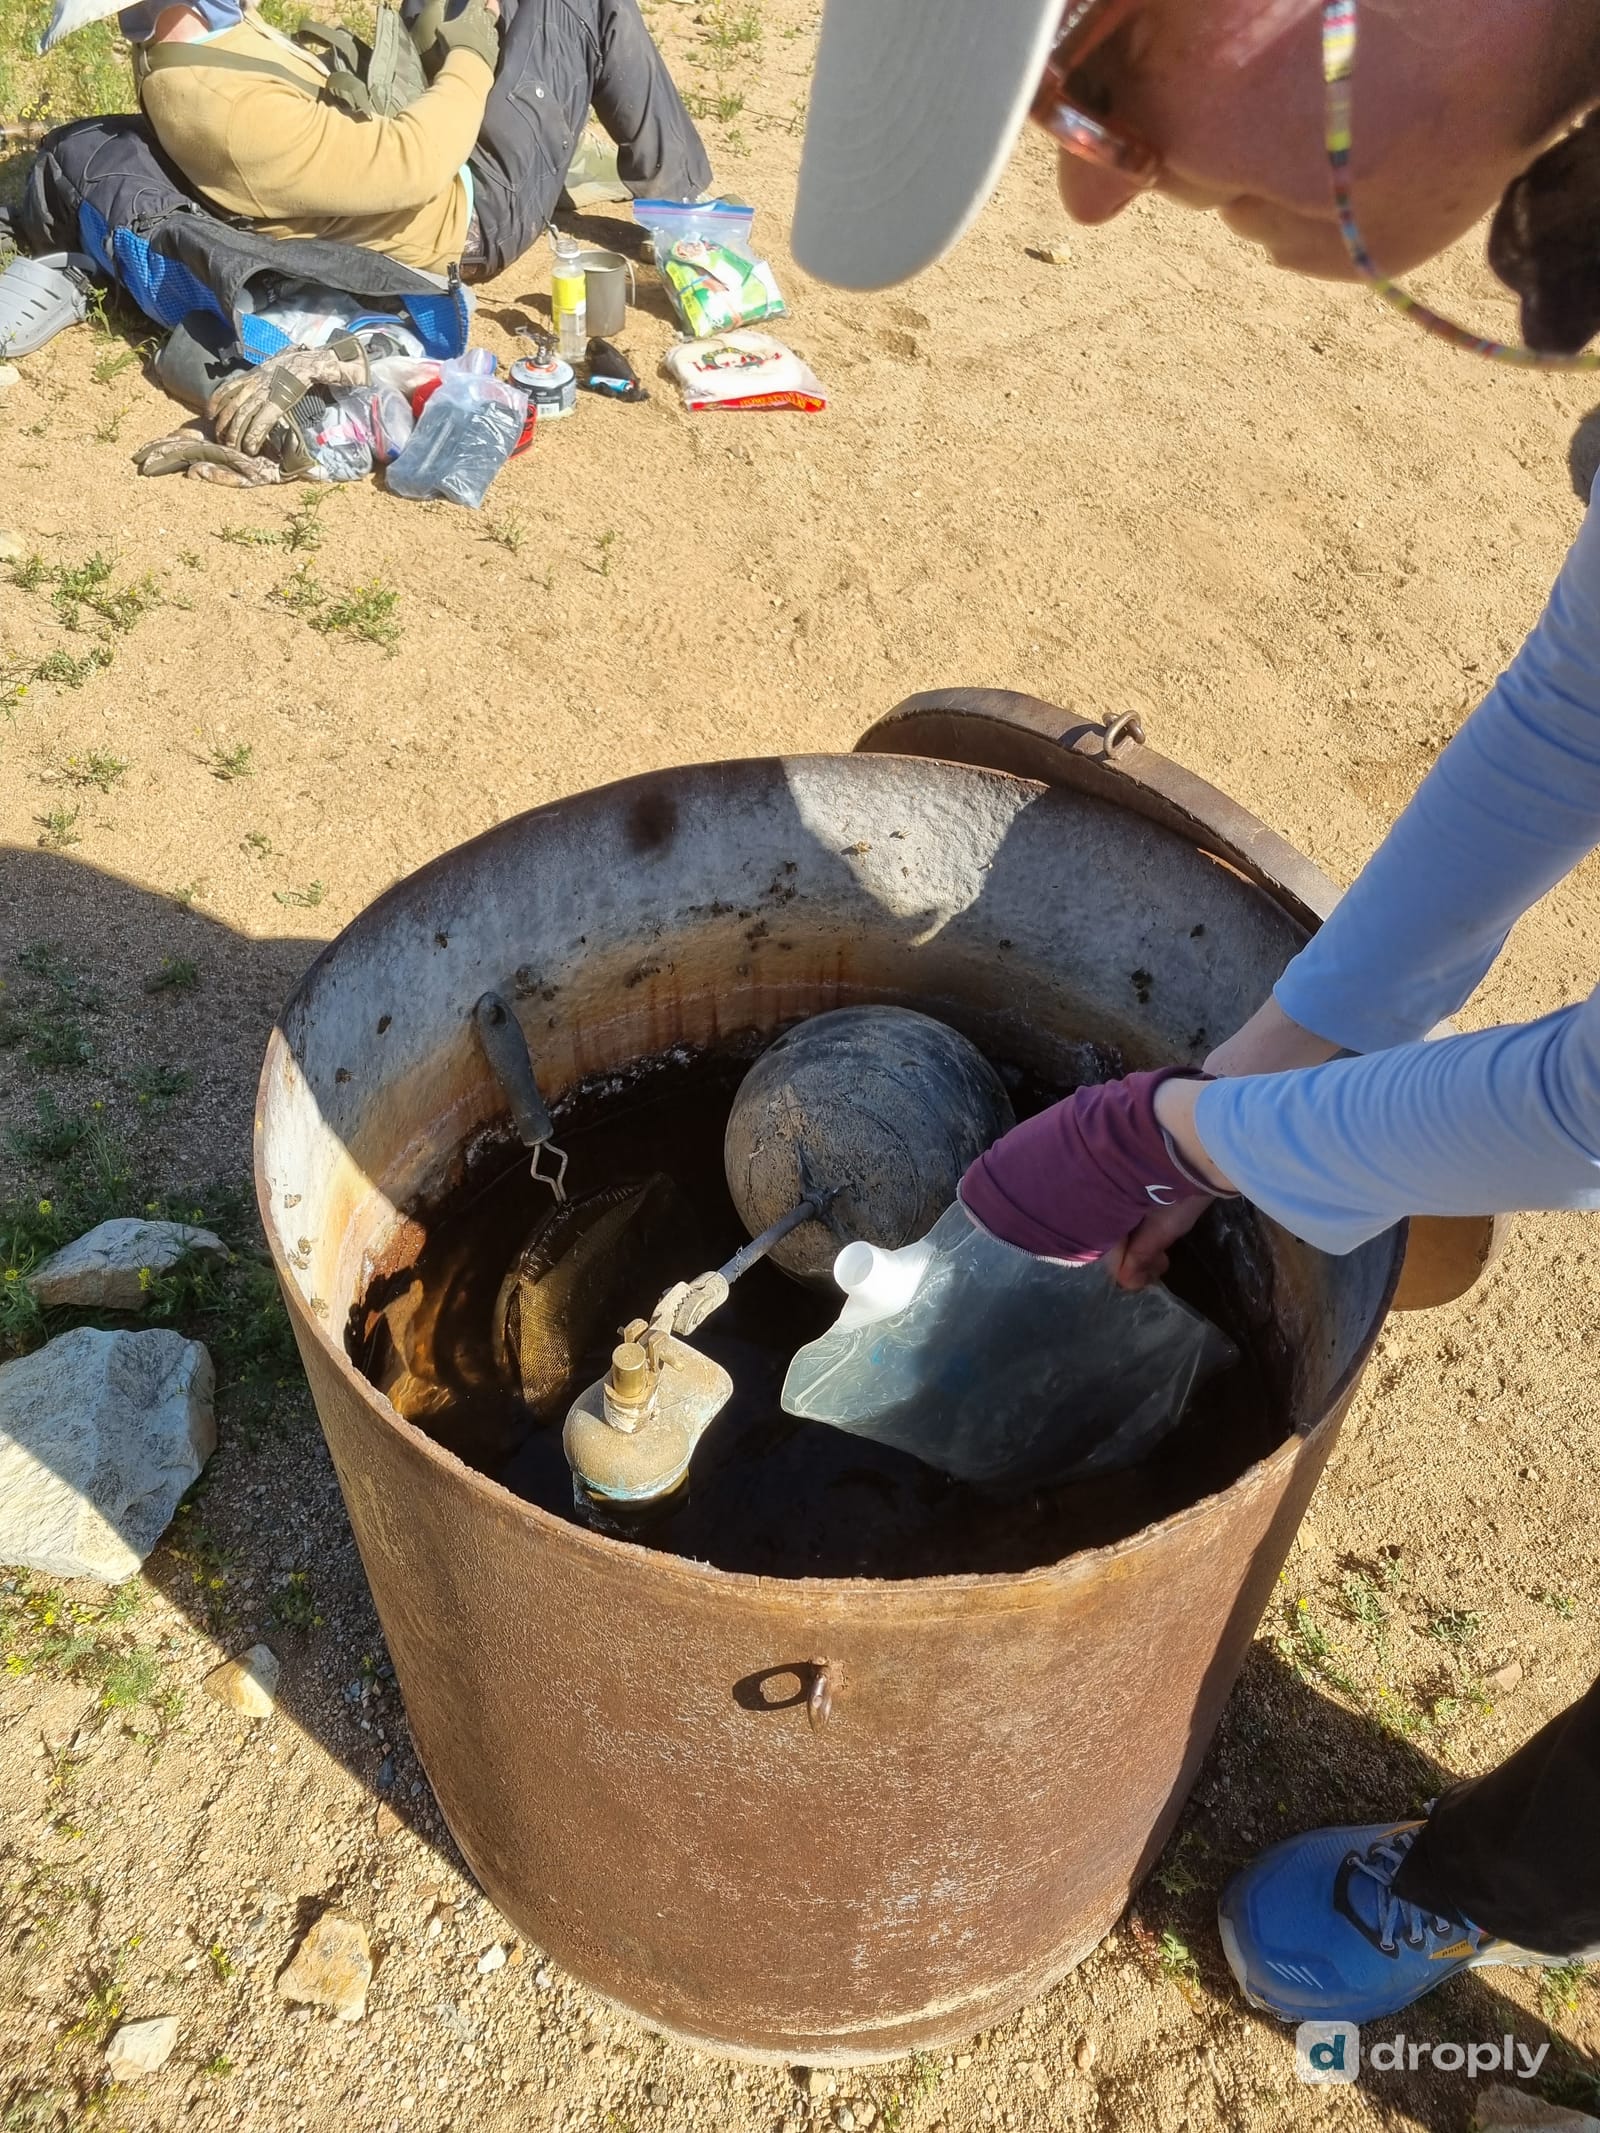
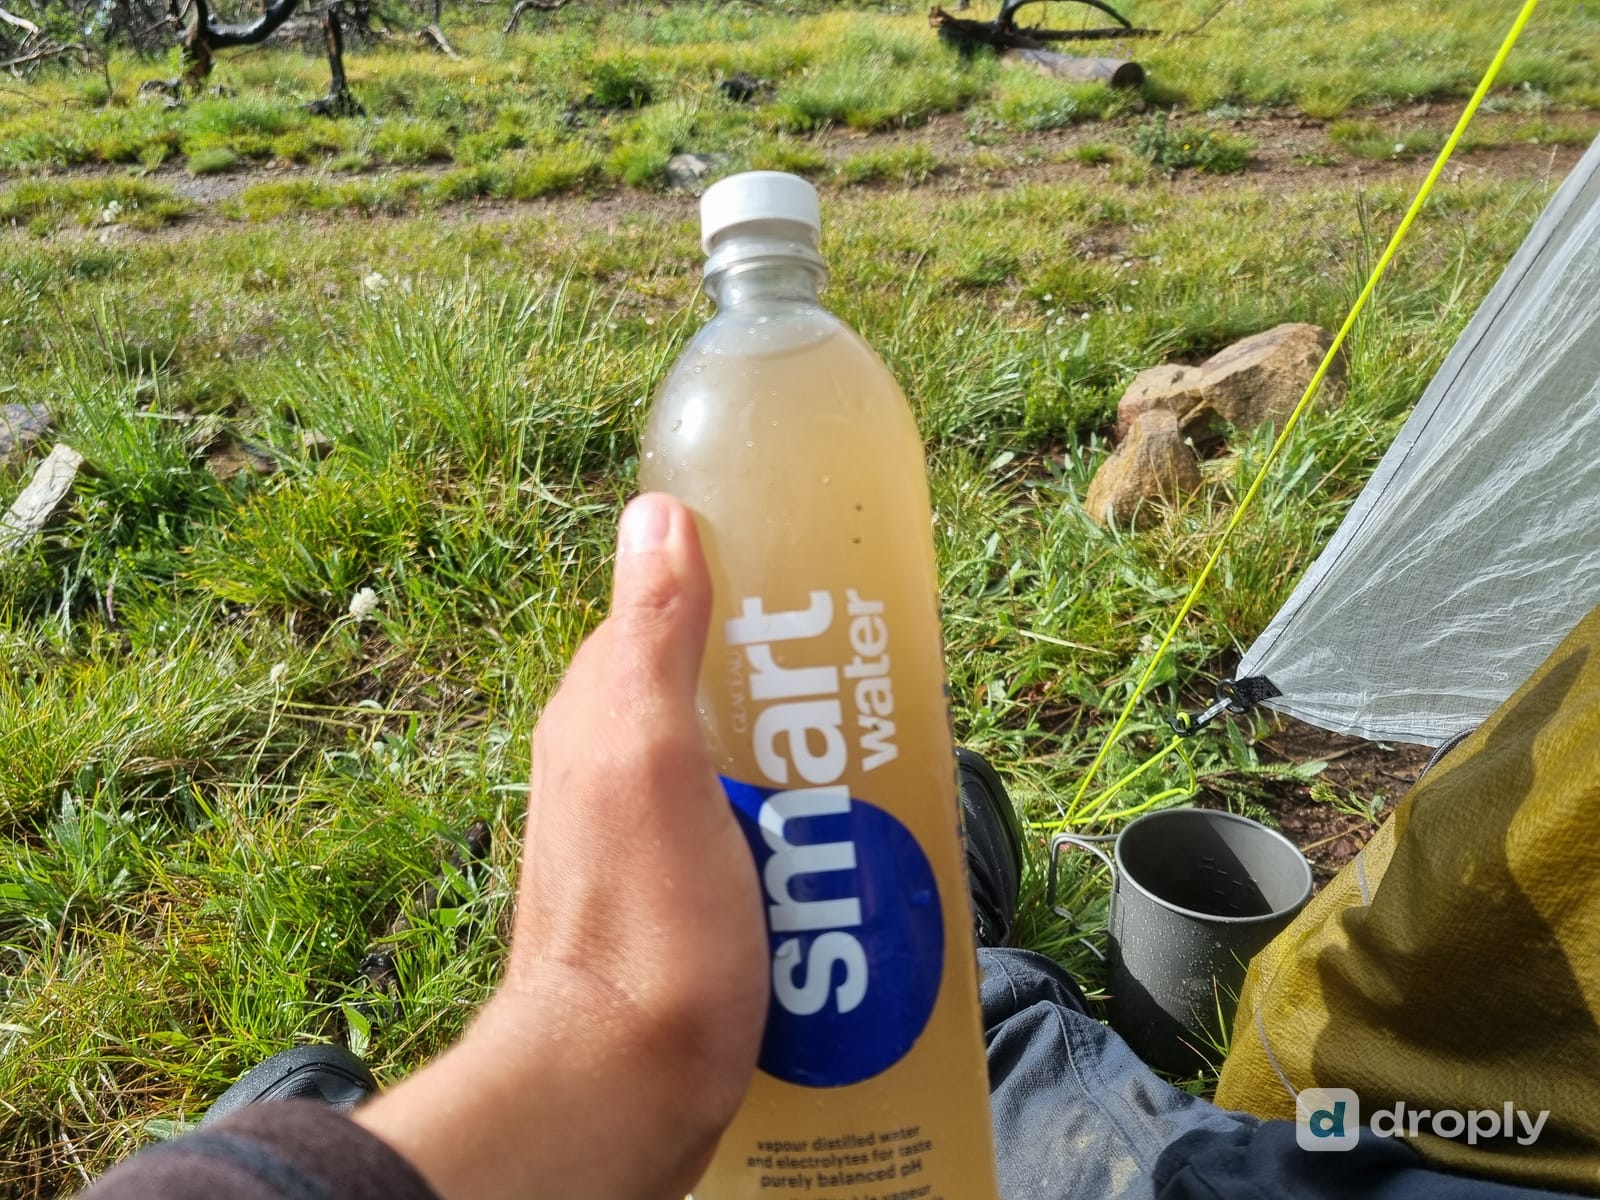
Cross-contamination is worth a whole rule of its own. Keep the “dirty” side, your collection bag, the bottle threads, your hands after handling raw water, completely separate from the “clean” side once water’s been filtered. The easiest way to enforce this on trail is buying your clean and dirty bottles from different brands. That way you can tell them apart at a glance and never second-guess which is which.
My personal setup on the CDT
I started the trail with a Sawyer MicroSqueeze. It worked well for the first stretch, no complaints, no clogging, fast enough to keep moving. But somewhere past the halfway point, the flow rate dropped. A fill that used to take under a minute started taking several minutes per liter, even with regular backflushing. That’s the thing to remember about any hollow-fiber filter: it’s a consumable, not a one-time purchase. Every liter you push through traps a bit more sediment in the fibers, and backflushing only removes part of it. Eventually the flow rate drops low enough that the filter has to be replaced, no matter how well you maintain it.
That’s when I switched to the Platypus QuickDraw, and I can only recommend it. It filters a liter in under 20 seconds when new, on top of the durability and easy backflush I described earlier. From that point on, my system was simple and repeatable: droply to find and confirm the next source, the QuickDraw to filter it into a standard PET bottle, and a strip of Micropur tablets buried in my pack as backup. At night, especially anywhere near or below freezing, the filter slept inside my sleeping bag rather than in the pack’s outer pocket.
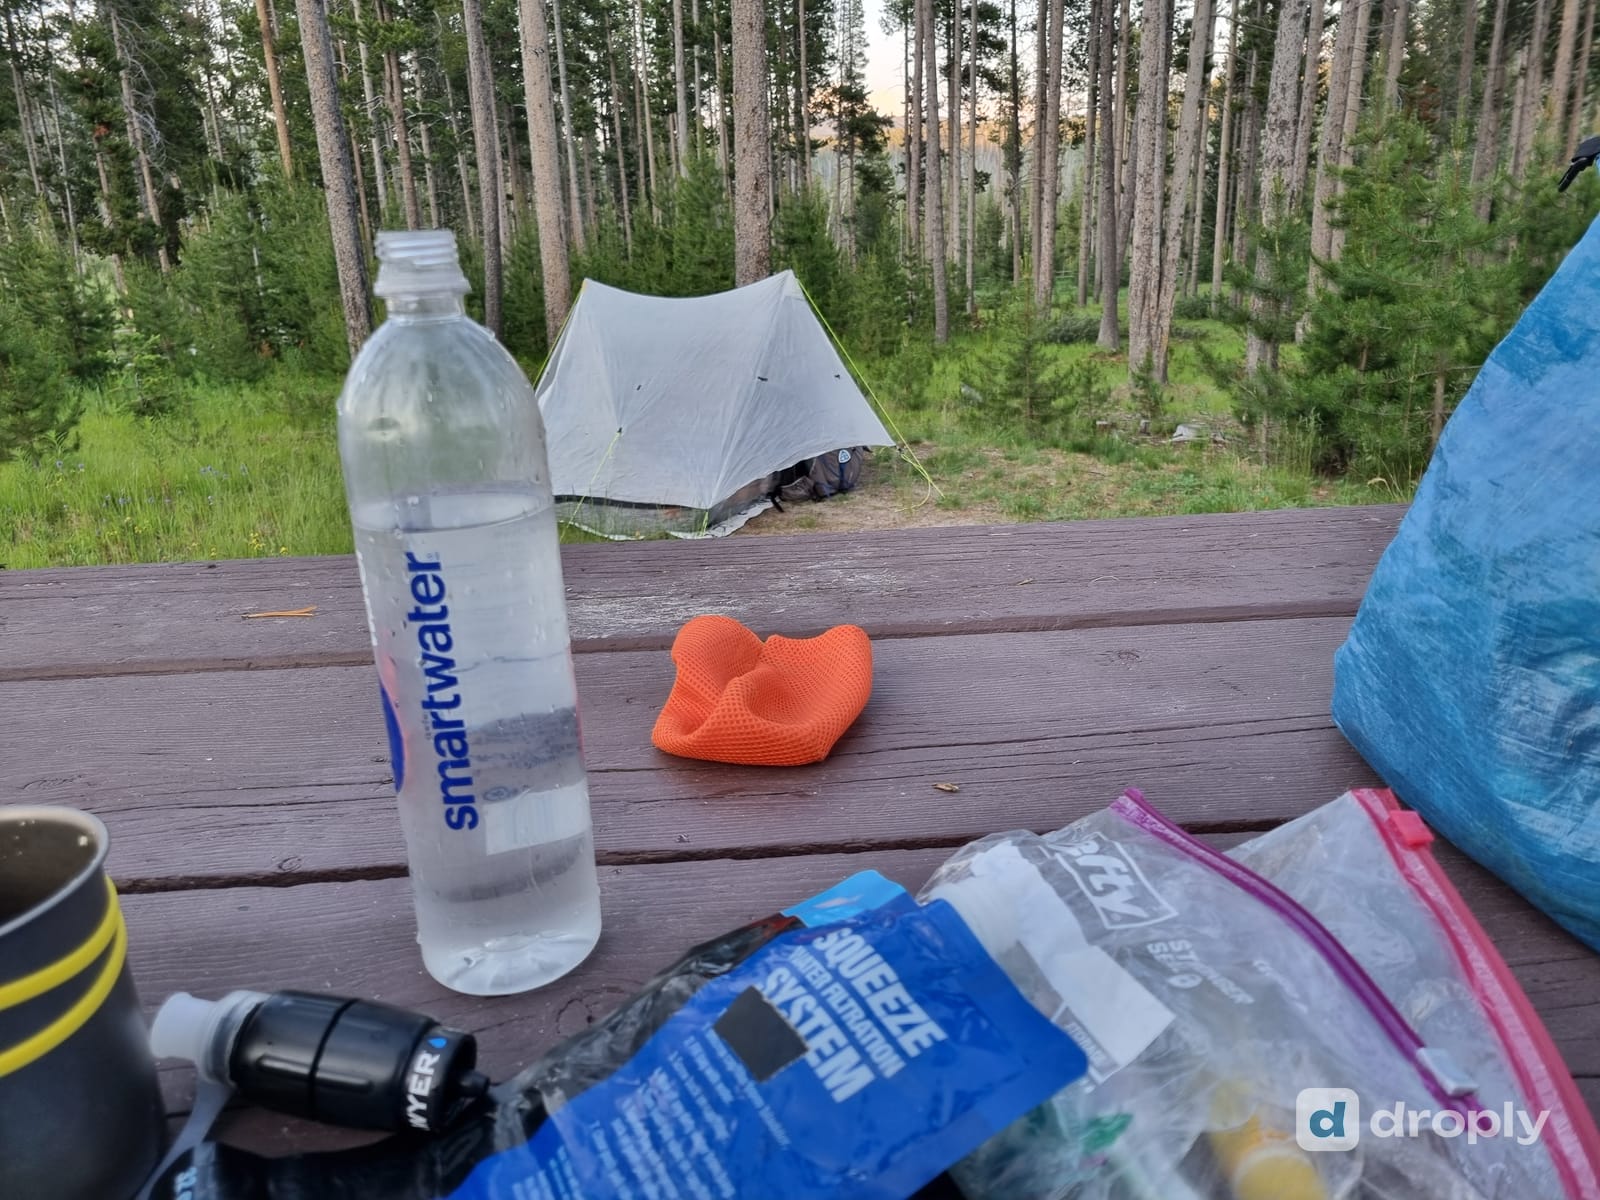
What worked: switching to the QuickDraw for the flow-rate difference alone, and never again letting the filter freeze after that one cold night that nearly ended it. What didn’t work: trusting a filter to be my only system. The night it froze solid, the Micropur tablets were not a backup I was glad to have “just in case.” They were what got me through the next two days until I could reach town and buy a replacement filter.
Those two lessons are why this guide is structured the way it is. Find water deliberately, replace your filter before it fails you instead of after, and always carry a backup treatment method that doesn’t depend on moving parts.
Conclusion
Finding water gets you to a source. Treating it correctly is what makes that water safe to drink, and skipping that step is how a manageable trail turns into a genuinely bad week. My hiking setup always has two components:
- droply to find reliable water sources, so I carry less water and hike more comfortably. See our complete guide to planning CDT water for how this plays out over a full thru-hike.
- A lightweight hollow-fiber filter, with a few Micropur tablets as an emergency backup that doesn’t care whether the filter is frozen, clogged, or just left behind at the last campsite.
That combination served me through five months on the Continental Divide Trail. It’s still the system I recommend to most hikers today, whether you’re planning a weekend trip or a thru-hike.
Frequently asked questions
What is the best water filter for hiking and backpacking?
For most backpackers, a hollow-fiber squeeze filter is the best combination of speed, weight, and reliability. The Platypus QuickDraw, Sawyer Squeeze, and Katadyn BeFree are the three most-used models on US long trails. QuickDraw has the fastest flow and easiest backflush, Sawyer Squeeze is the cheapest and most field-repairable, and BeFree is the lightest but has a shorter lifespan. Day hikers are often better served by a filter bottle, and groups or basecamp setups do well with a gravity filter.
Does a hiking water filter remove viruses?
No, standard hollow-fiber backpacking filters (0.1–0.2 micron) remove bacteria and protozoa but not viruses, which are far smaller. This is rarely an issue in remote European or North American wilderness, where waterborne viruses are uncommon. It becomes a real concern downstream of towns, campsites, or in international travel with unclear sanitation. In those cases, use a purifier, which adds virus protection, or add a chemical treatment step.
Is clear mountain water safe to drink untreated?
No. Clear water can still carry Giardia, Cryptosporidium, E. coli, or Campylobacter from upstream wildlife, livestock, or human activity, and none of those are visible to the eye. The CDC recommends treating all backcountry water in the US and Canada regardless of how clean it looks.
What should I do if my water filter freezes?
Replace it. A frozen hollow-fiber filter can develop microscopic cracks in the membrane that let contaminated water pass through the same pores meant to stop it, and the damage often isn't visible or even noticeable in flow rate. Never let a wet filter freeze. Sleep with it in your jacket or sleeping bag on cold nights, and if it does freeze after use, don't risk it on the next fill.
Do I need a filter or a purifier for hiking?
A filter (0.1–0.2 micron, hollow-fiber) is enough for the vast majority of backcountry hiking in Europe and North America, where bacteria and protozoa are the main risk. A purifier adds virus protection through a tighter membrane, UV light, or chemical treatment, and is worth carrying for international travel or water sources downstream of dense human activity.
How can droply help me find water while hiking?
droply is a free, community-driven app that maps springs, fountains, streams, and other water sources, tagged by type with recent flow reports from other users. It fills the gap general trail-navigation apps leave for off-route sources like windmills, taps, and lesser-known springs, letting you plan tighter water carries and refill more confidently.
Published on
Some links in this article are affiliate links. If you buy through them, we may earn a commission at no extra cost to you. It never affects our recommendations.
← Back to blog  By Micha · Co-Founder, droply
CDT thru-hiker (2024) · Co-founder of droply
Micha co-founded droply after thru-hiking the Continental Divide Trail in 2024. A former scout and lifelong outdoor enthusiast, he's always chasing water sources to map: hidden natural springs and hot springs are his favorites.
Get new posts in your reader
New guides and trail notes land in your feed reader the day they're published. No email address, no account, no tracking.
Feed address
https://droply-app.com/rss.xml